This website is a participant in the Amazon Services LLC Associates Program, an affiliate advertising program designed to provide a means for sites to earn advertising fees by advertising and linking to amazon.com.
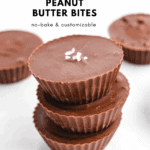
Two ingredient, no bake, super simple, chocolate peanut butter fudge. They're customizable with all kinds of add-ins and can be quite fun to experiment with and change things up. Everyone can have their own personalized chocolate treat.

For more simple chocolatey treats try hot chocolate with oat milk, vegan chocolate microwave mug cake, chocolate pudding with oat milk, or vegan chocolate sauce. For something a little more decadent try chocolate raspberry truffles or chocolate covered cookie dough bites.
Jump to:
Tips
- For these 2 ingredient chocolate peanut butter fudge bites, I use silicone muffin cups to portion off the chocolate into individual servings. You can use paper muffin cups if you don't have silicone ones.
- There's no sweetener in this recipe so make sure to use semi-sweet chocolate for a sweet treat.
- Toothpicks work great for stirring goodies into each cup to customize them individually.
- If your peanut butter does not contain salt, you may want to add a pinch to the chocolate mixture when you add the peanut butter.
- I use natural peanut butter that contains just nuts and sometimes salt. If you use peanut butter that contains added oils and sweeteners, it may alter the taste and texture of the treat.
- During testing, chocolate chips (ex. Enjoy Life) created a firmer texture in these 2 ingredient peanut butter cups when compared to using a chocolate bar or a baking chocolate bar (chocolate bars that are made for baking).
- The combination is not suited to be cut into squares like traditional fudge, it softens quickly outside the refrigerator or freezer. That's why I use silicone muffin cups or paper muffin liners.
Variations
- Crushed or broken pretzels
- Cocoa nibs for a little crunch
- Brown rice puffed cereal
- Vegan marshmallows
- Freeze-dried fruit (ex. Raspberries)
- Pinch of sea salt to the top (which does sink into the chocolate but is still good)
- Your favorite vegan cookies crushed up
- Roasted chopped hazelnuts or roasted macadamia nuts

Instructions
- Melt the chopped chocolate either using the microwave method or the DIY double boiler method. There's no added sweetener so make sure your chocolate is semi-sweet.
- Once your chocolate is melted, stir in the peanut butter until smooth.
- Line a muffin tray with silicone muffin cups or paper muffin cups.
- Either add your toppings to the melted chocolate mixture, wait to customize each individual serving after portioning off, or leave it as just chocolate and peanut butter.
- Portion the chocolate into each cup. I use about 6 muffin cups and fill them about ½ full if it's just the chocolate peanut butter mixture. The larger the serving, the longer it will take to set up. How many goodies you use will also alter how many servings you get.
- If you are adding any goodies to the individual portions, a toothpick is helpful to stir them into the chocolate, it doesn't get as coated with chocolate as a fork or spoon does.

Microwave method for melting chocolate
If microwaving the chocolate, use a microwave-safe bowl. Microwave for 30-second increments, making sure to stir after each increment. Stop when the chocolate is about 90% of the way done. Stir it together and the residual heat should melt the rest of the chocolate.
Double boiler method for melting chocolate
Place a glass or stainless steel bowl over a pot that has about 1-2 inches of water in it. There needs to be enough water to boil, so it will create steam to heat the bowl that will melt the chocolate.
Leave 2-3 inches of room between the water and the bottom of the bowl so you don't have direct contact. The bowl needs to fit into the pot to create a seal so the boiling water or steam doesn't squirt out. Boil the water and add the chopped chocolate to the bowl. Stir frequently until the chocolate is melted.

Storage
Store the 2 ingredient chocolate peanut butter fudge in the refrigerator to stay soft and fudgy or keep them in the freezer for longer storage. If frozen, let them thaw slightly before serving. The fudge firms up quicker in the freezer than it does in the refrigerator.
Related recipes
- Chocolate Raspberry Truffles
- No-bake Cookie Dough Bites
- Chocolate-Covered Cookie Dough Bites
- Peanut Butter Cookie Bars
- Microwave Hot Cocoa
- Chocolate Peanut Butter Nice Cream
- Vegan Chocolate Sauce (3 Ingredients)


As always, I hope you enjoy this recipe for 2 ingredient vegan peanut butter fudge! If you like the recipe, feel free to rate it and leave a comment.
Originally posted on February 2, 2021, updated on February 12, 2022.
PrintRecipe

2 Ingredient Chocolate Peanut Butter Fudge
- Total Time: 40 minutes
- Yield: 6 servings 1x
- Diet: Vegan
Description
Two ingredient, no bake, super simple, chocolate peanut butter fudge. They're customizable to add all kinds of add-ins and quite fun to experiment with and change things up.
Ingredients
- 4 ounces (113 g) semi-sweet chocolate, chopped (about ½ cup + 2 ½ tablespoons if using chocolate chips)
- ¾ cup natural peanut butter
Variations
- Crushed or broken pretzels
- Cocoa nibs for a little crunch
- Brown rice puffed cereal
- Vegan marshmallows
- Freeze-dried fruit (ex. Raspberries)
- Pinch of sea salt to the top (which does sink into the chocolate but is still good)
- Your favorite vegan cookies crushed up
- Roasted chopped hazelnuts or roasted macadamia nut
Instructions
- Melt the chocolate using a double boiler or the microwave and line a muffin tray with silicone muffin cups or paper muffin cups.
- Microwave method: Use a microwave-safe bowl and microwave the chopped chocolate for 30-second increments, making sure to stir after each increment. Stop when the chocolate is about 90% of the way done. Stir it together and the residual heat should melt the rest of the chocolate.
- Double boiler method: Place a glass or stainless steel bowl over a pot that has about 1-2 inches of water in it. Leave 2-3 inches of room between the water and the bottom of the bowl so you don't have direct contact. Boil the water and add the chopped chocolate to the bowl. Stir frequently until the chocolate is melted.
- Then stir the peanut butter into the melted chocolate until smooth.
- Any added goodies can be added to the entire batch or wait to add them to the individual portions. Portion the chocolate peanut butter mixture into individual servings in muffin liners (silicone or paper), filling them about ½ way to ¾ of the way.
- How many servings you get will determine how many goodies you add to the mixture.
- Place in the freezer for 20-30 minutes, or until they have firmed up but aren't frozen. Thaw slightly if they're too firm. If you leave them in the freezer for a few hours or longer, they will be frozen and will need to slightly thaw to your desired texture.
- Storing in the refrigerator will keep them soft, or use your freezer for longer storage and to keep them firm (let thaw slightly before serving).
Notes
There's no added sweetener so make sure to use semi-sweet chocolate otherwise, the treats won't be sweet.
If your peanut butter does not contain salt, you may want to add a pinch to the chocolate mixture when you add the peanut butter.
I use natural peanut butter that contains just nuts and sometimes salt. If you use peanut butter that contains added oils and sweeteners, it may alter the taste and texture of the treat.
During testing, chocolate chips (ex. Enjoy Life) created a firmer texture when compared to using a chocolate bar or a baking chocolate bar (chocolate bars that are made for the purpose of baking).
The combination is not suited to be cut into squares like traditional fudge, it softens quickly outside the refrigerator or freezer.
The fudge firms up quicker in the freezer than it does in the refrigerator.
- Prep Time: 10 minutes (plus 20-30 minutes chill time)
- Cook Time: 2 minutes
- Category: dessert
- Method: stove or microwave
- Cuisine: American


Sharon says
These are so easy and I already had everything to make them. The kids liked them too!
Allie says
I'm glad you enjoyed them!
Alex says
Very easy recipe and was such a fun dessert to make with the kids! We tried pretzels and Dandies, both flavors turned out great.
Allie says
I'm glad you enjoyed the recipe, the pretzels and Dandies sound delicious!